Ever look in your cupboards and say to yourself, “I need to waste more of my food”? I have heard your wish, and present its fulfillment in the form of salt dough.
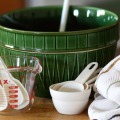
- 2 cups flour
- 1 cup salt
- ¾ cup water
- 2 tablespoons vegetable oil
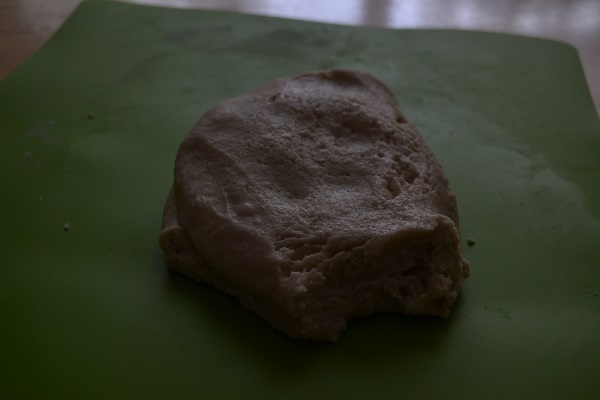
Make sure to mix the flour and salt thoroughly before adding the wet ingredients. Once you are done mixing and kneading, it should look like this:
If you want actual playdough colors, just add some food coloring. It should be good for a few days in an airtight container, but it has so much salt I would not be surprised if whatever eventually grows from that lump will be the source of the next penicillin. That said, when I stuck it in a Tupperware for a few days, it got a little closer to batter than dough. If that happens, just spread it out on a plate or cutting board and leave it out overnight. The excess water will evaporate, and the oil in the dough will ensure that the dried out crust will become assimilated with a little kneading.
When it comes to turning your dough sculpture into persistent art, you have a few options. You can let it dry in the air; this takes forever, but probably does the least to alter the sculpture. You can also bake it in an oven at the lowest possible temperature, but even then it tends to brown the outside. Or you can be like me, and throw it in the microwave for three minutes. This method does swell the dough a bit, and taller pieces tend to slump, but it’s quick and easy.
THE ROLLING PINNACLE
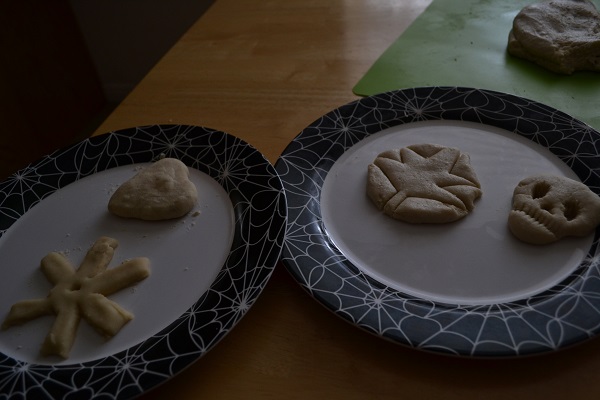
If you have no confidence in your sculpting skills, there is yet hope. Roll out the dough nice and thin and go to town with cookie cutters. Be warned, this dough will stretch and warp when you try to peel it off the work surface of your choice. The solution is to work the dough on the surface you will bake it on. If you feel cookie cutters are too limiting, you can use a knife to cut the dough into the shape you desire. In this manner, you can make far too many ornaments for the holidays.
If you are evil, put frosting on them and serve them at a party for people you don’t like. If you aren’t evil, you can paint them and hang them on a tree or something. Be sure to use a non-toxic paint, especially if you anticipate kids ever getting their grubby hands on them. Why? I can’t speak for anyone else, but when I was a kid, I liked to lick these salt dough ornaments. Turns out kids have more in common with horses than you might think.
SALTY THE DOUGHMAN
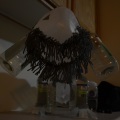
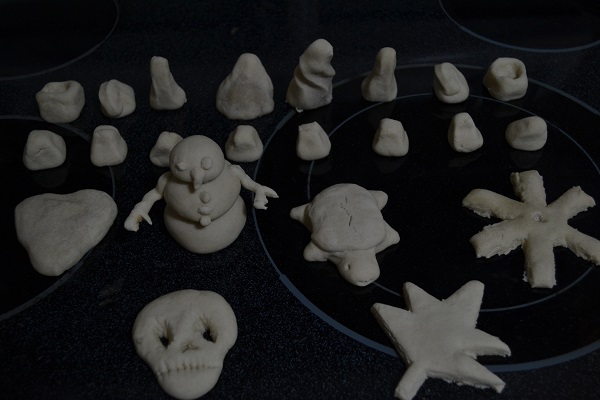
Now, three dimensional sculpture with salt dough is kinda tough. It tends to sag no matter what you do with it, so you are better off building everything on the ground floor, so to speak.
Remember how I said that you can dry it out in the open? That gives you an interesting option here. You can attach the separate pieces with little bits of dough, and as long as the resulting stack is stable, it’ll cement together.
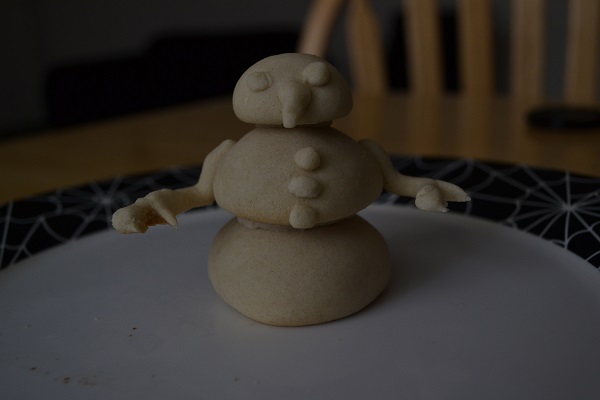
What you are looking at is largely additive sculpture – sticking pieces onto a base. You can go another way, which is to say manipulating the dough into the shape you want. When you do this, you start with a lump of dough, and mold it into the basic shape of your sculpture. Then you pinch and pull the dough to form the limbs and details, though I find a knife is a handy tool for making lines and divots.
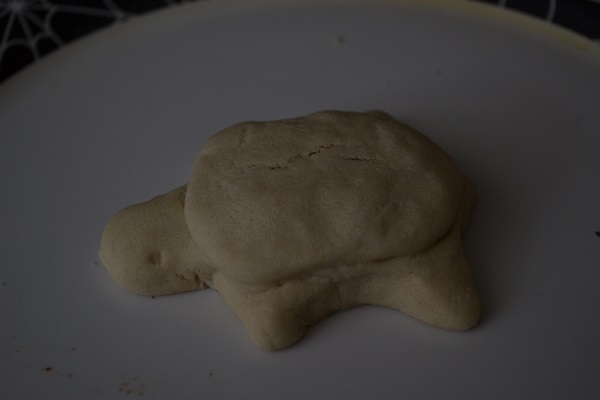
While you can’t quite get the intricacy of working with actual clay, you can get a sort of rounded off aesthetic that is oddly appealing. If you don’t like how it is turning out, mash it up into a ball and try again. This dough is pretty forgiving like that.
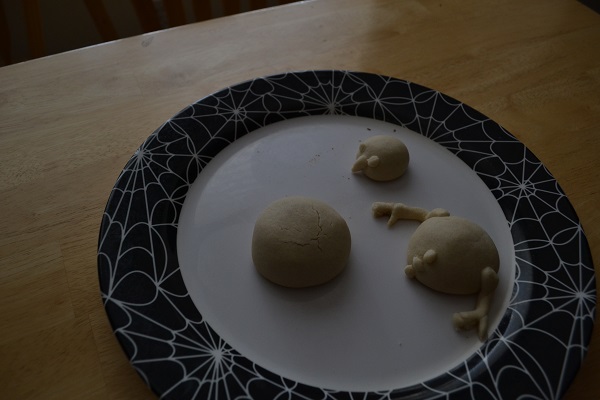
A STRATEGY FOR LEFTOVERS
Once you have made what you want to make, you might find you have quite a bit of leftover dough. Now might be the time to break out the cookie cutters. Or maybe it’s time to learn how to play chess.
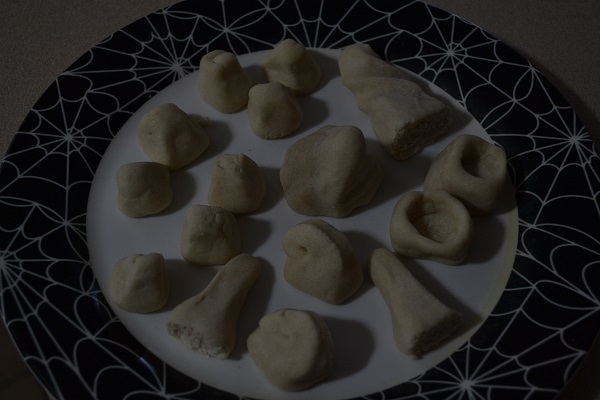
While it’s not terribly classy, it works. Be sure to make each piece visually distinct, and at least reminiscent of the actual chess piece. You may note that my bishops and the queen are lying on their sides to be baked. This is one way to get past the sagging tendency of the dough. However, because they are on their side, they might not balance when righted. After nuking the chess pieces, I took my knife and sawed off the bottom, making a nice flat surface. It is best to do this while they are still warm and almost soft.
Hopefully, I have given you some ideas, and even if not, try what I have shown you. You might find you have more in common with horses than you think.
 About Brandon Quist
Brandon is originally from Olmsted Falls, Ohio. He has studied both at Baldwin Wallace college and Brigham Young University, and is currently pursuing Chemical Engineering, among other things. He considers himself a jack of all trades, and a master of none. In his spare time, Brandon enjoys knitting, guitar, reading, origami, writing, and photography.