
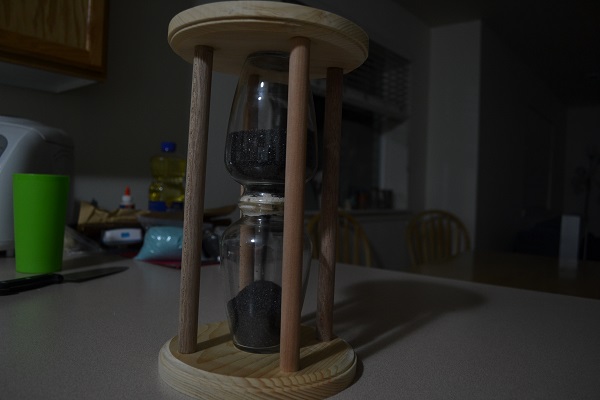
If I could measure time with a bottle, the first thing that I’d like to do is to flip it over and over again and watch the sand fall. Hourglasses are nearly as mesmerizing as lava lamps, and are much classier. Sadly, they are not nearly as common nowadays, with mechanical and digital timepieces dominating the chronometer scene. Let’s fix that.
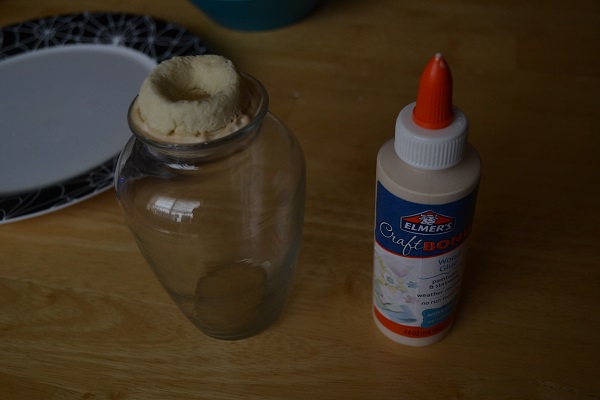
To start with, you’ll need
- 2 glass jars, or small vases if you want to be fancy
- 4 wooden dowels twice as tall as the jars/vases
- 2 wooden plaques
- A fair amount of sand, or lots of salt
- Wood glue
Before you get to making anything, it is important to determine how big you want the hole to be between the two bulbs of the hourglass. If you use a large grain sand, you’ll need a bigger hole or else it will clog. If you want the sand to pour for longer, a smaller hole is necessary. To be honest, I’m not entirely sure where you would get fine grain sand. However, I do know that you can get lots of table salt pretty cheap, and that is pretty fine grain stuff. When will wasting food not be a thing? The world may never know. Anyway, once you get your sand, experiment to see what you like.
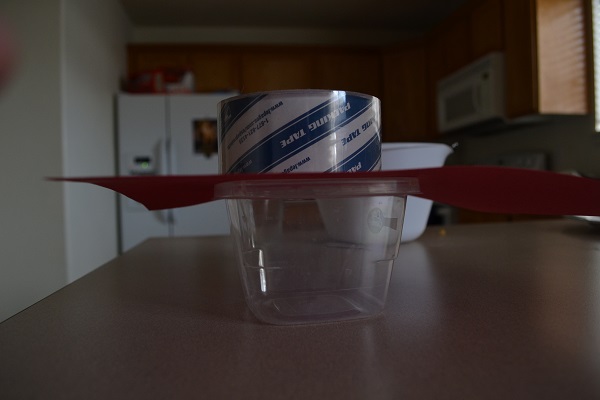 Look at that incredibly scientific setup. The roll of tape is mostly there to keep the sand on the paper while I stab it full of holes, like so:
 It was Colonel Mustard in the kitchen with the steak knife. So you have figured out the size of the hole, now what? It’s time to waste more food. You could use cardstock paper as the partition between the bulbs, but it’s kinda flat and I feel it is too prone to tear. That’s where our old friend salt dough comes in. This way you can actually get a slope from the walls of the jar down to the orifice of crossover.
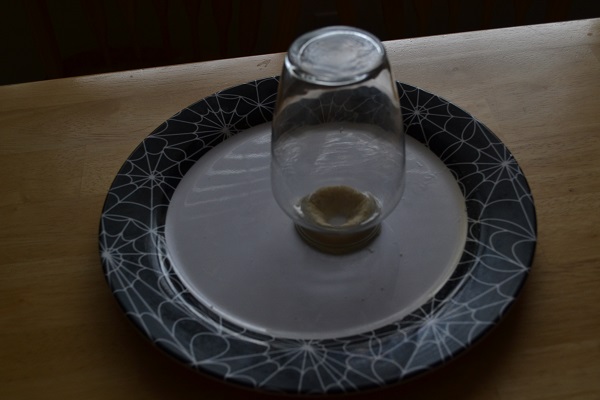 I used a ¼ batch of salt dough, which should give you plenty of material to work with. Use the jar like a cookie cutter, then carve out the funnel, then make sure it fits the jar again. Once you get the funnel to your liking, make another one.
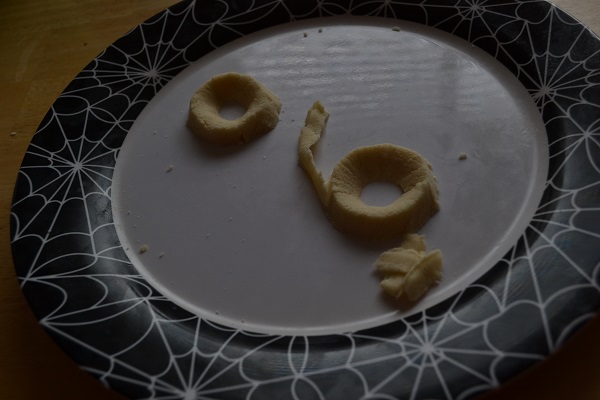 Take a knife and peel off a thin layer from the outside of the funnels. That way, when it bakes it won’t become too large to fit the mouth of the jar. If you mess up, that’s fine. Just keep mashing and cutting dough until you find something that works. At this point you may start to feel the soul-weariness of a true craftsman. That’s supposed to happen. The funnel of an hourglass is what makes it special, and so you need to be satisfied with what you have. After you bake the two pieces, glue them together. Before you glue them to the mouths of the jars, do a trial run, sealing the gap with your fingers’ grip. You may find that you want to change the aperture size, as I later did only after gluing the funnel in place.
 Even then, you can add some salt dough to narrow the hole, but it won’t be pretty.
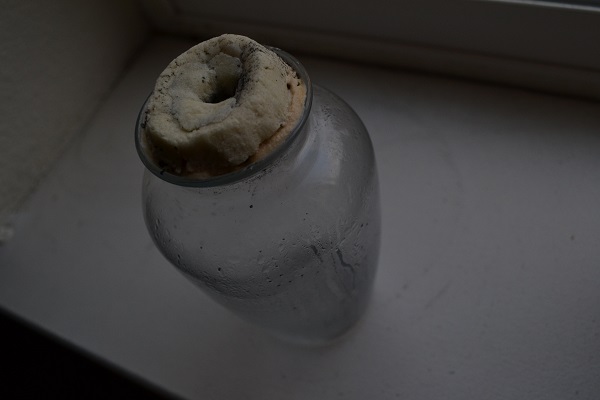 I’m pretty sure that’s a Sarlac. Also, see that water in the jar? That’s because when you microwave something, it’s the water molecules that get agitated. Water in the jar is a bad thing. Sand will stick to the walls and salt will dissolve, much like your hopes and dreams. All you can do is put it in some sunlight and let it dry out.
Let’s say you avoided my fate. Now you can glue everything together, hopefully with the sand in the bottom bulb.
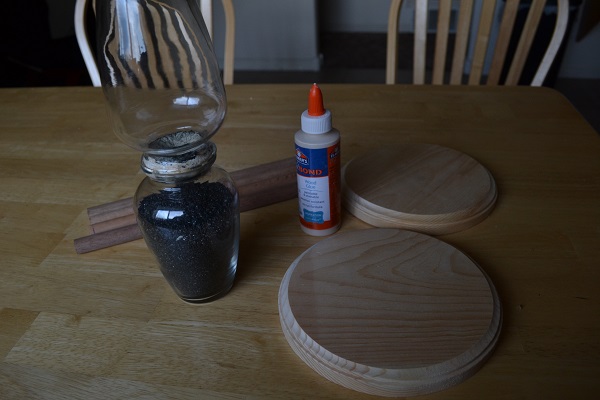 Now, those dowels weren’t originally the correct length. Consult your toolbox, or alternatively, your most masculine relative and/or friend. Paraphrasing my father, “Careful with that saw, Eugene.”
This is where the wood glue gets a little more literal than the previous uses in this article. The hourglass is fairly easy to center, and glue at the base. The dowels are a bit trickier, and need to be held down for 30 seconds to a minute. While the glue is wet, try to make everything look right, there are no take-backs hours later.
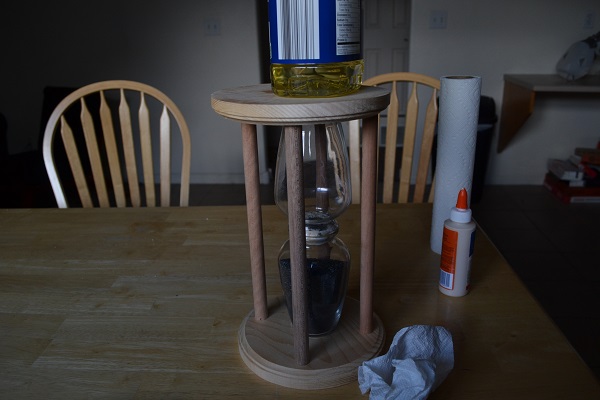
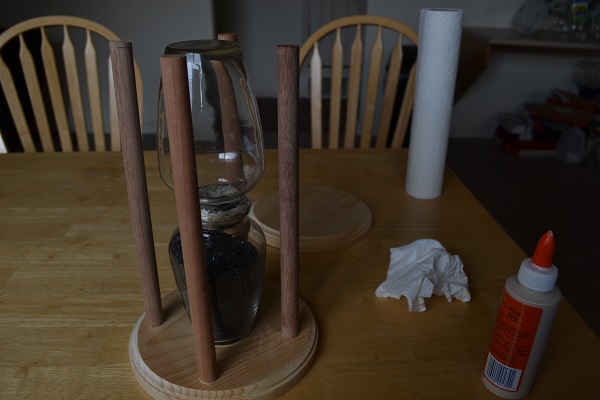 This goes double for putting the top on. You may find some dowels come a little short, but an extra bit of wood glue will bridge the gap. You will want to adjust the top a lot. That’s why you have a paper towel or two on hand to wipe up the blotches that result from repositioning. Once you get it to your liking, let it set for a while. The glue bottle recommends putting the thing in a clamp, but I doubt most people have clamps that big. That’s alright; just use some school books or a vegetable oil bottle.
All that remains is to write the name of someone you love on the edge, and present it to them.
“Your time is up.”
Black robes and scythe are entirely optional, but highly recommended.
Brandon is originally from Olmsted Falls, Ohio. He has studied both at Baldwin Wallace college and Brigham Young University, and is currently pursuing Chemical Engineering, among other things. He considers himself a jack of all trades, and a master of none. In his spare time, Brandon enjoys knitting, guitar, reading, origami, writing, and photography.


Hey, great one! I’ll have to check it out on Skype sometime. Liked the puns, especially when they paraphrase me. 🙂