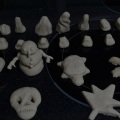
Most 3D printers are fairly complicated, and require a specialized program to operate. However, if the objective is to lay down layers of material that hardens into a coherent whole, we already have the tools. A low temperature hot glue gun: the poor man’s 3D printer.
SLOW AND STEADY
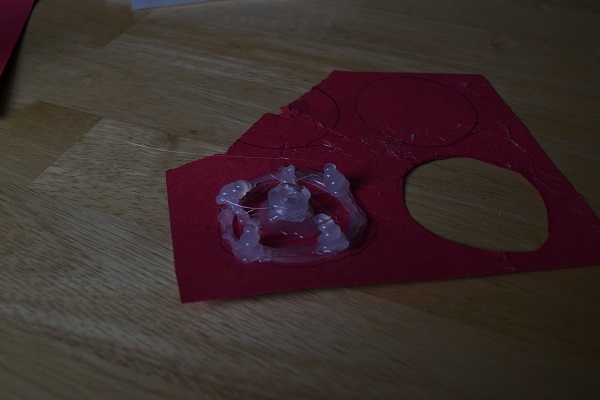
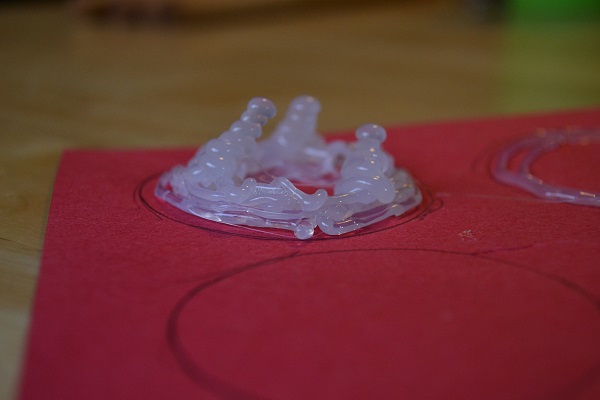
I like to start with a ring of glue, to set the boundaries of the sculpture and to give me something to build off of. With this particular piece, a turtle, I also put a blob down in the middle to hasten things along. Admittedly this results in the turtle having a pronounced belly button, but it doesn’t seem to mind.
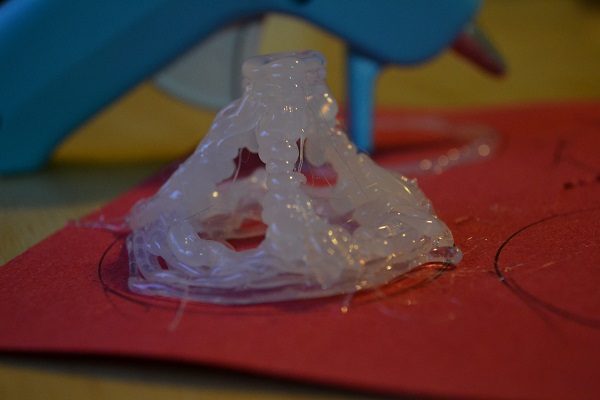
Hot glue is a funny substance. You can’t build a tower of drops in an instant; you have to wait for the last layer to cool and get a little cloudy. In the meantime, I recommend watching a mildly engaging show you have always been meaning to watch, but never really got around to. Netflix is the popular dealer, but if you are like me, your own video library has some likely candidates. The next thing to do is to gradually place your glue near the edge. If you go too close, it may just drip down. You can fix this by tilting the sculpture so that gravity actually works in your favor, like the fickle friend that it is.
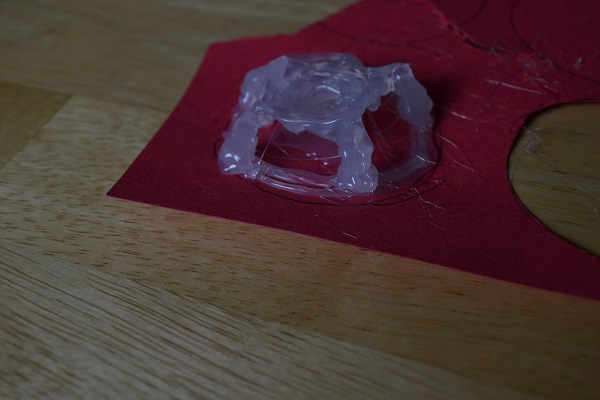
Once your separate pillars lean close enough, you can merge them together. This gives you a solid perimeter to gradually expand and build on. In between the main layering, I like to go back and add a little substance to the legs and tail. Keep in mind that the tip of the gun is hot, and will melt what it touches. You can use this to smooth out things a little, and give it a more coherent texture. At this point, you may notice you occasionally leave thin threads of glue nearly everywhere. This should be a familiar choice, to destroy everything that lies outside of your vision of the future, or to embrace the cobwebby fate and re-imagine yourself as a spider.
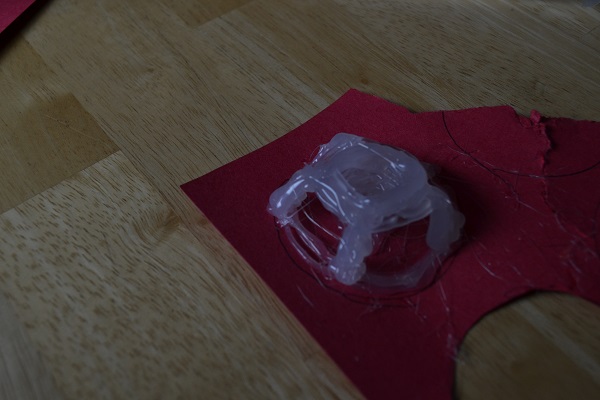
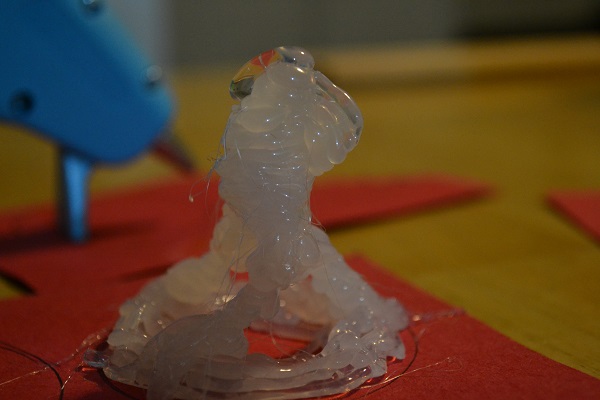
Whatever you decide, keep your mind open. Here I could have made it a frog with little trouble, and if it was more appealing, I would have done so. Instead I followed through on my turtle intention and set the foundation for the step pyramid of its shell. Likewise I left a space open for the head, and tried to hint at the lip of the shell above it.
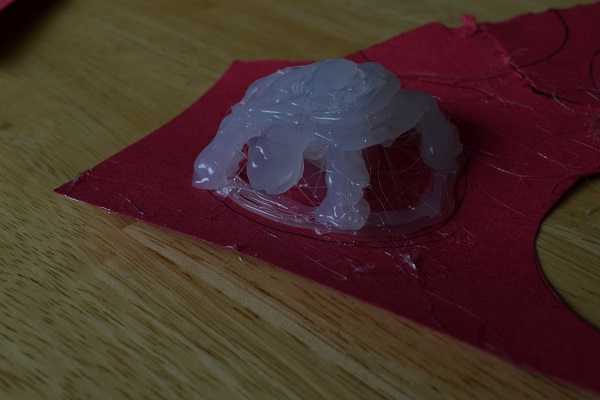
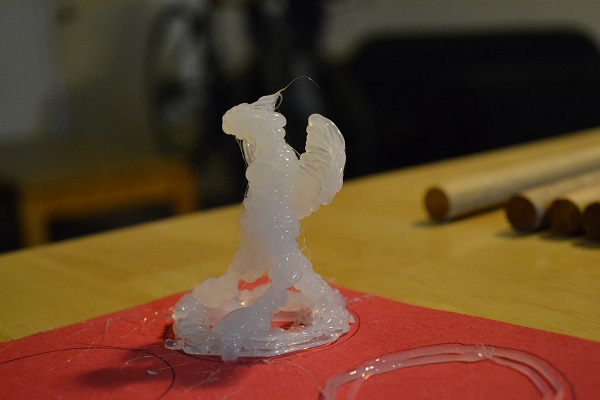
Hot glue doesn’t lend itself to sharp edges, so you end up trying to make straight lines out of curved shapes. If you look closely at the nose of the turtle, you might see a v shape on top of the main curves of the head. And there you have it, a 3D turtle. It’s a very stable structure, with a lot of supports that making the initial stages go by somewhat quickly. If you want to try something harder…
SOMETIMES THESE ARTICLES DRAG ON
From a circle rises three pillars. Ostensibly, you could make do with two, but three is more stable. This is glue, not Minecraft blocks. Structural stresses are still things you have to deal with.
It’s beginning to come together. At this time, it is important to reevaluate the proportions you are working with. If the legs are this tall, the rest of the body should be so tall, and so on.
Note how the torso has more or less closed off, and bits are sticking out of the back. That’s the obvious stuff. Look at the upper part of the legs, where I added a bit more meat to make it look closer to an actual dragon thigh.
Those of you more familiar with draconic taxonomy will politely point out that what you are looking at is more aptly termed a wyvern. I’m not disagreeing, but calling something a dragon makes it about one order of magnitude cooler than a wyvern. Also, look at that majestic head, it’s obviously a dragon. A note about wings: by slightly changing the slope of the line each time you apply a layer, you can make the wing curve. You can also put the layers slightly off from purely vertical, and have the wings point in any number of directions.
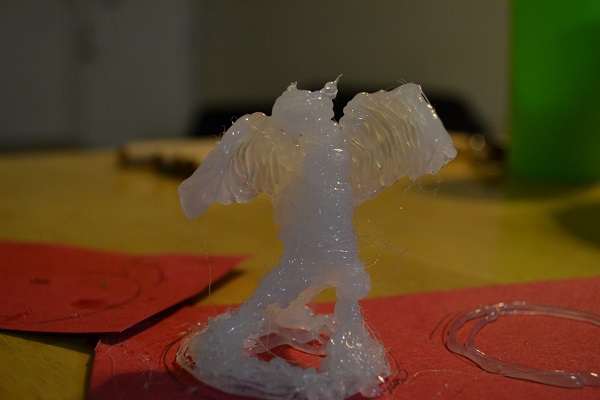
At this point, I felt the wings were too small. This is the case with almost all amateur renditions of wings; people just don’t make them as large as they need to be. It wouldn’t be much of a problem in this case, except the wing on our left is pointing its leading edge almost directly at the head. To fix that, I had to use the gun tip to melt both where the wing joins the back and where it curves the most. Once the glue cooled in the new position, I could continue.
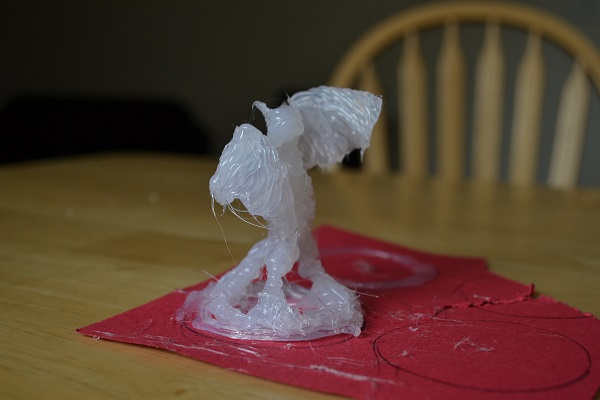
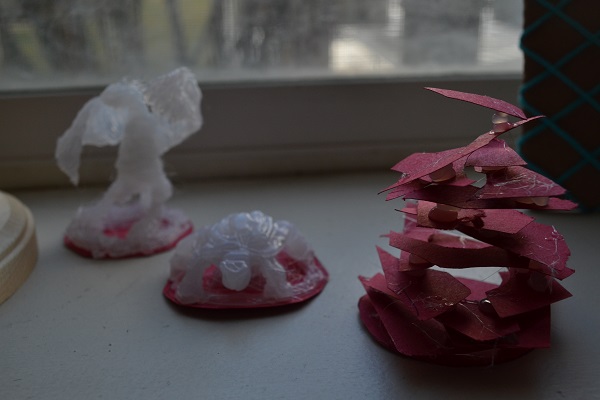
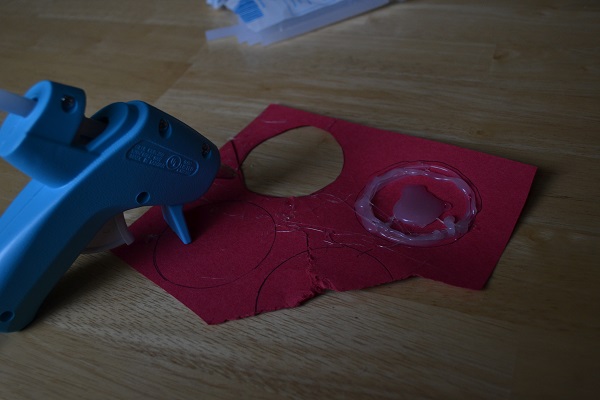
Never has adhesive looked so fierce. Looks like I’m done here. Oh, what’s that? Thank you, Dora the Explorer viewers; your dislocated cries for my attention have brought up the topic of the red thingy in the header picture. I simply cut the left-over construction paper into squiggly shapes, and glued it together with little columns of glue, giving it depth and a general spiral upwards.
With all the money you save from not buying a 3D printer, you can do all sorts of things, or be like me. Prowl the aisles of the craft store, looking for something familiar to shine in a new way.
Brandon is originally from Olmsted Falls, Ohio. He has studied both at Baldwin Wallace college and Brigham Young University, and is currently pursuing Chemical Engineering, among other things. He considers himself a jack of all trades, and a master of none. In his spare time, Brandon enjoys knitting, guitar, reading, origami, writing, and photography.