
There is something about a ball pit that brings out the kid in me — and my son is in love with them! Every time we have therapy, they reward his hard work with some time in the ball pit. It is so hard for us to get him out of that thing! So I decided to make him his very own ball pit for his birthday. He is at an age where he keeps growing almost overnight, so I looked online for an adult-size ball pit design to get my creative juices going.
Inspiration
My inspiration!
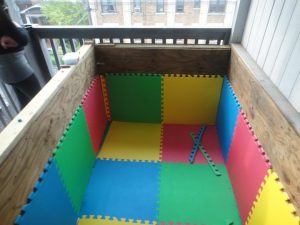
I went to Pinterest. Most tutorials suggested ball pits that were made out of PVC, but I was looking for one that could withstand crazy boys. Then I found this one by someone who had built a ball pit on their balcony. The instructions were really easy to follow! The instructions are here, along with my inspiration picture (seen to the right of this paragraph). Clearly, I had to make some changes (like bringing it indoors).
I went to Lowe’s and had them cut sheets of 2 x 4 Luan plywood to size for me. I chose Luan because it is sanded so smoothly that I knew there would be minimal sanding to do. I chose to make my ball pit 3 feet tall, 4 feet wide, and 6 feet long. I wanted to be sure the whole family could fit into our new addition. If I had it to do again, I wouldn’t have made it quite so tall. Three feet doesn’t seem high until you have to hurl yourself over the wall every time you get in and out. (I did create steps to help us get in and out. I’ll show you.)
First, the Box
I wasn’t planning on sharing this tutorial until I was halfway through, so I created a couple graphics to illustrate how I assembled the wood. It is similar to the tutorial from Pinterest, but I added a few tweaks. First, because we were on padded carpet, I didn’t put a 2×4 on the bottom of the piece. It was SO heavy that I couldn’t move it. Plus, the deep carpet and padding actually supports the sides of the ball pit — something I didn’t expect.
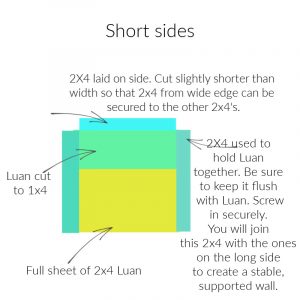
Here are graphics to show you how I assembled the wood for the box of the ball pit.
![]()
On the long sides, I made the top 2 x 4 longer so that I could secure it to the 2 x 4 on the short sides. I took a picture to show you how the screws look assembled. This, along with securing the 2 x 4’s together with 3-inch self-tapping screws, kept me from having to use brackets or any other form of wood structural support. Being a ball pit, anything inside it is an injury risk, and I wanted to eliminate as much of that as I could.
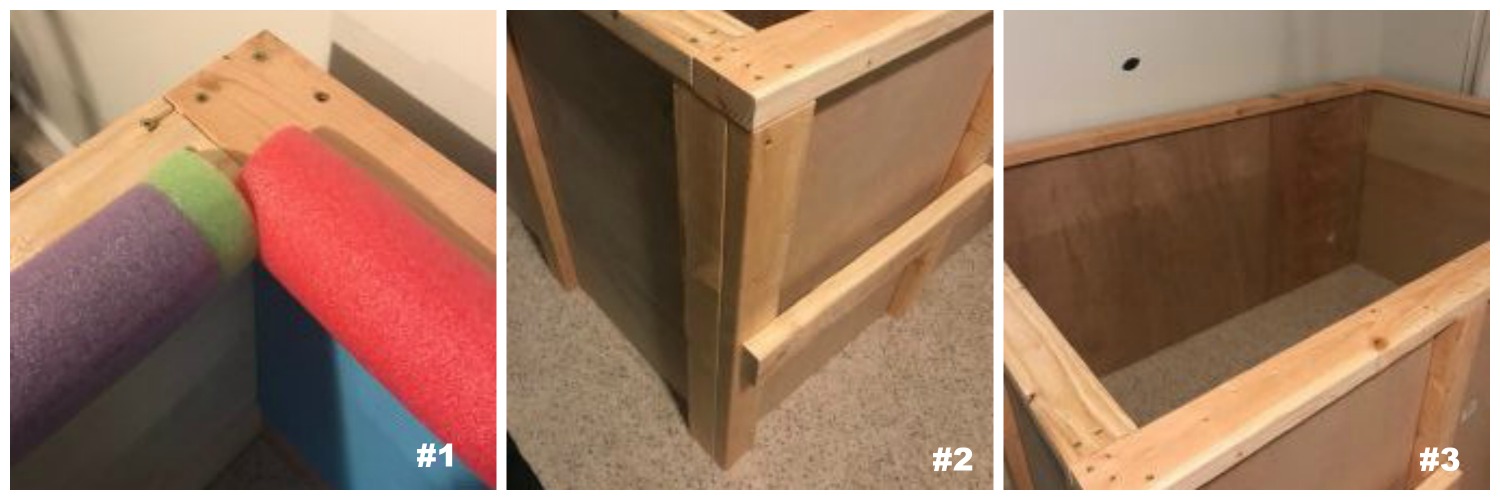 Picture #1: Corner Joint; Picture #2: Corner 2 x 4’s screwed together, and a step to get into the pit; Picture #3: An easy view of the inside of the ball pit before all the padding was added.
Once I had the box built, it was time to pad the inside and finish the outside. As my dad put it, anything exposed would eventually begin to splinter, and I wanted to avoid that. This is a ball pit, after all, not a splinter pit!
Building the Ladder
I went inside the box to inspect how things were, and I realized that a step ladder was needed or my boy would be living in that box for much longer than he planned. I’m actually pretty proud of myself for coming up with this little bit of engineering. I used the same concept as building braces to support the walls of the box, with a 12-inch support between each step. That way, the weight of anyone climbing up is supported.
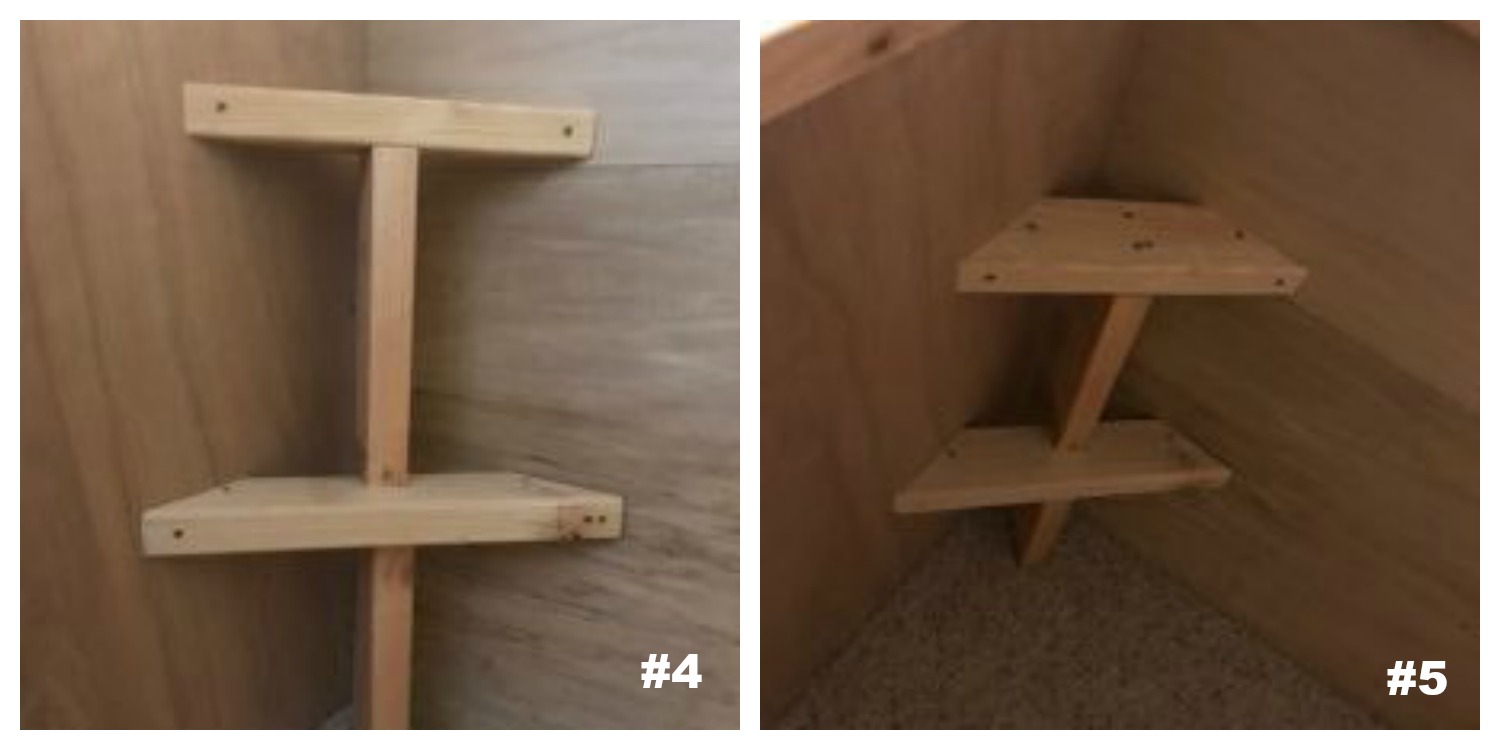 Picture #4: Ladder with screws inserted to the walls; Picture #5: View from above to illustrate how I stacked the stairs backward to give space for stepping.
Adding Padding
Once the ladder was built, I realized that it would need to be padded just like the rest of the box. So I got out my construction adhesive, scissors, and got to work. The foam tiles I used are found on Amazon here, and weren’t as expensive as I expected.
I used two of the small packages to fill the box. I made sure to attach them only with construction adhesive, because I knew that any staples or nails would eventually become sharp parts to scratch yourself on. I used Gorilla Glue’s heavy duty construction adhesive because it has a fast grab time. You only have to hold it up for about 30 seconds before it is up for good, but you can move it for a brief time if needed.
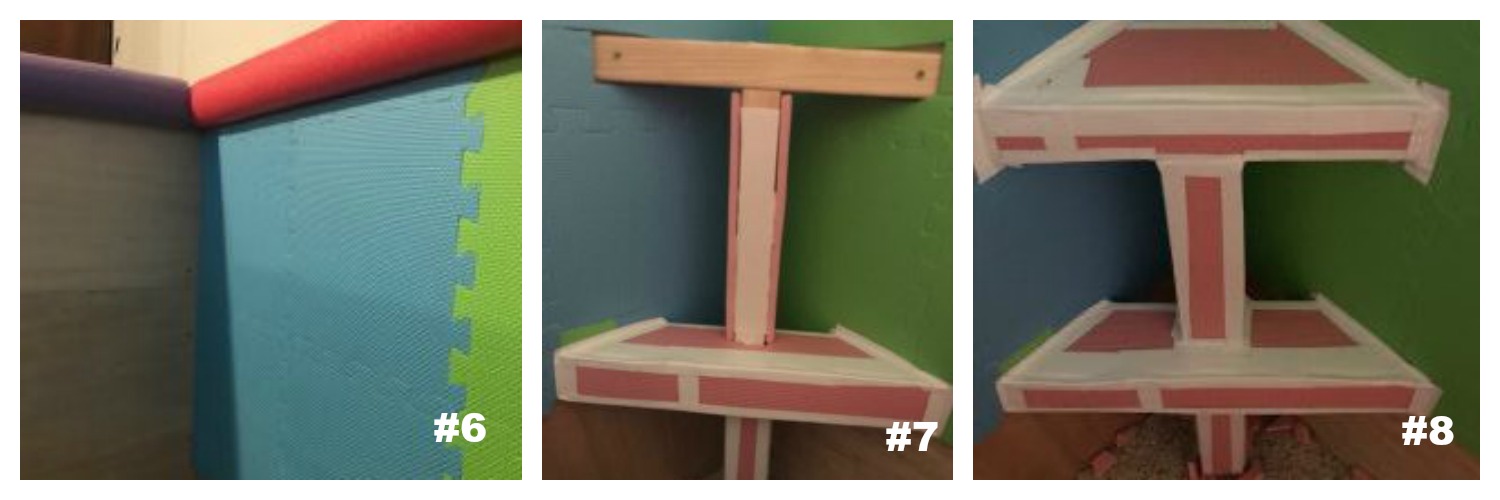 Picture #6: The foam as I put it up; Picture #7: The foam on the ladder in the process. I added Duck Tape to secure the edges; Picture #8: The finished product.
If you are running short of foam, start from the top and work your way down. The bottom foot or so of the box will be covered in balls anyway, and it will need much less padding that way. I still used two containers even though I followed this tip.
The foam attachment to the steps can be a bit tricky, so I did a focused photo trio to illustrate it. The edges of the foam need to be slanted to it fits properly. I just used my scissors to make an angle for each corner section.
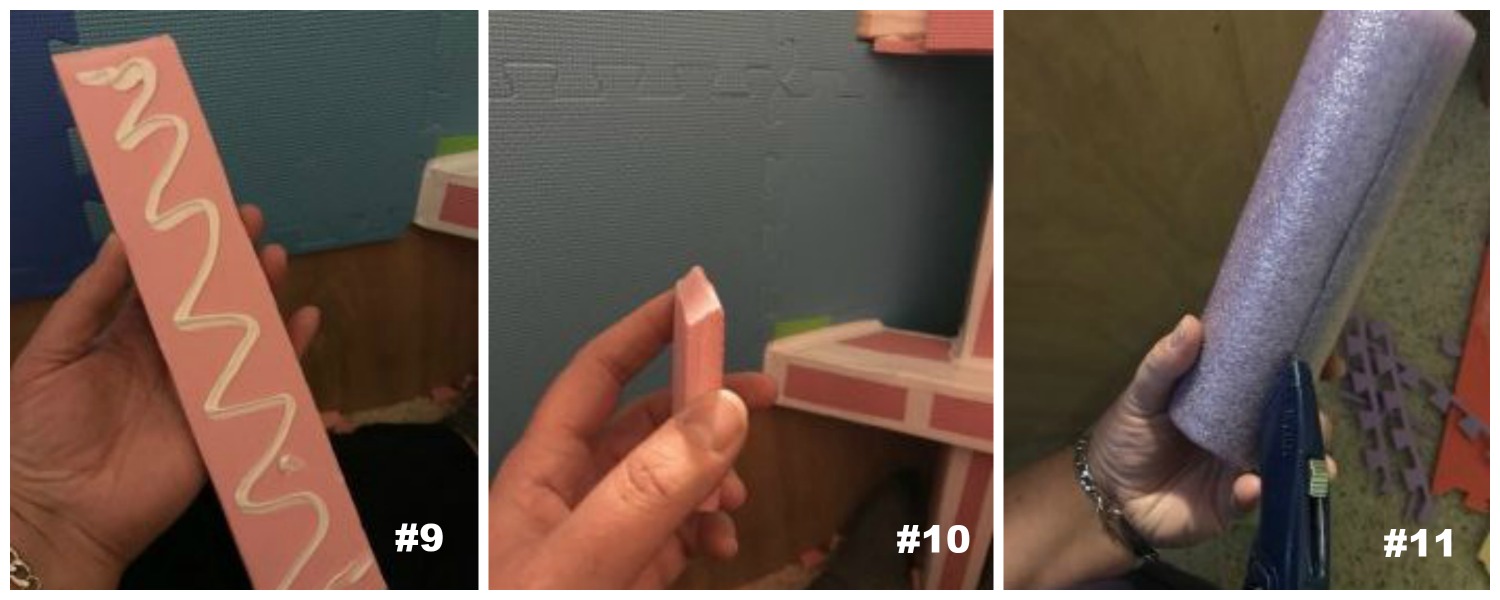 Picture #9: Use enough adhesive to do the job, but don’t use too much or it makes a mess. I used about this much and it was good; Picture #10: An up-close image of the angle I was just describing; Picture #11: An illustration of how I cut the pool noodle.
After that, I took some pool noodles and cut them down the center so I could use them to line the top of the ball pit.
Upholstering the Outside
You could stop there, but I am a little picky about how things look, so I took some canvas and upholstered the outside. Here is the process I followed with that one. I took my staple gun and 1/4-inch staples. Then I gathered about 5 yards of heavy weight duck cloth. I waited for a sale (and got a little extra because I wasn’t sure how much it would take). I had a lot left over, so if you are wanting to save a few dollars, I would measure the outside of your ball pit that will be exposed to the room and buy just enough material to cover that. I also ordered a roll of upholstery cardboard tack strip. It’s a lifesaver when you are stretching fabric on anything. I will show you why.
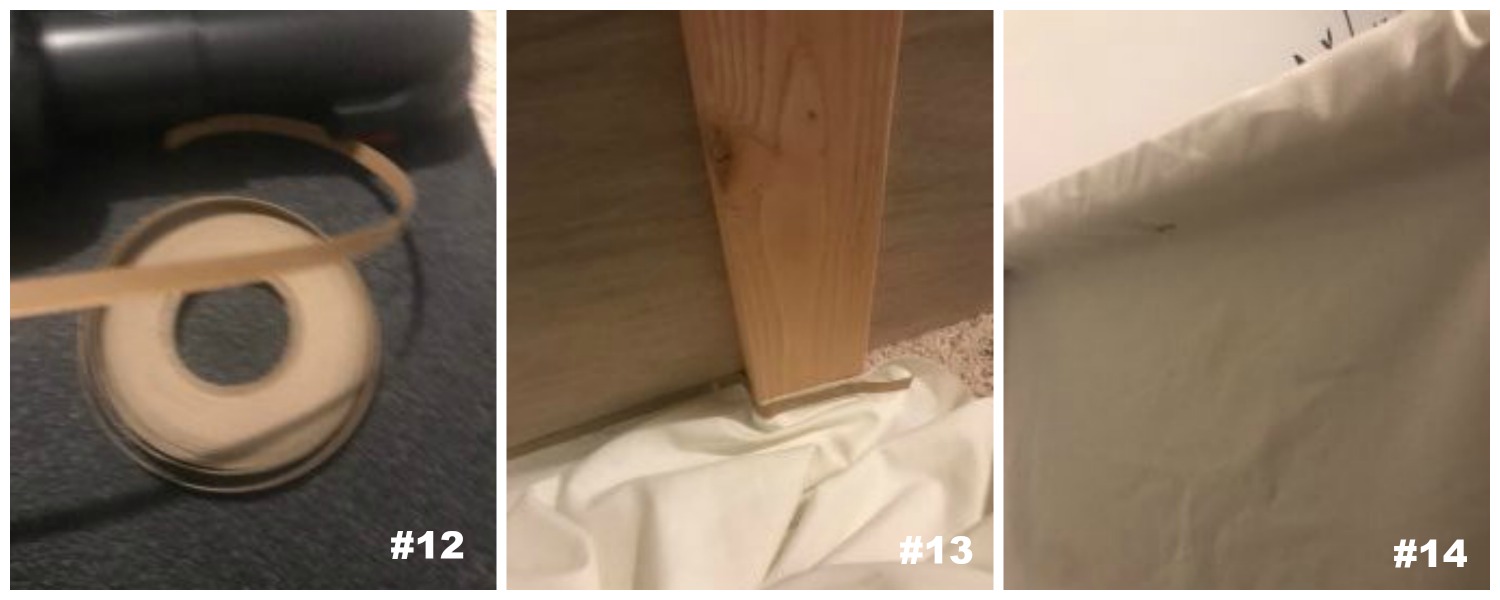 Picture #12: Upholstery cardboard strip; Picture #13: Upholstery strip stapled to the box; Picture #14: Pull your fabric tight and staple along the top edge to keep it tight.
You will want to attach the cardboard stripping along the bottom of the box. Make sure the fabric is between the stripping and the box as you staple. Then when you are done, fold the fabric up and you will have a nice clean line. This is super handy when you miss and end up with a wad of staples in any given area. It totally hides all your mistakes.
I pulled the fabric up and over the side of the box and stapled it tightly along the top of the inside of the box. That way, there’s no exposed wood to risk any splinters being knocked loose over time. I stapled the remaining fabric tightly along the top of the box so that when I wrapped the pool noodles around the edges, it would cover the seam. When you reach the corners, just fold the fabric over and staple a nice line to finish it off. You could also use the cardboard stripping if you want. I didn’t, but it turned out nicely anyway.
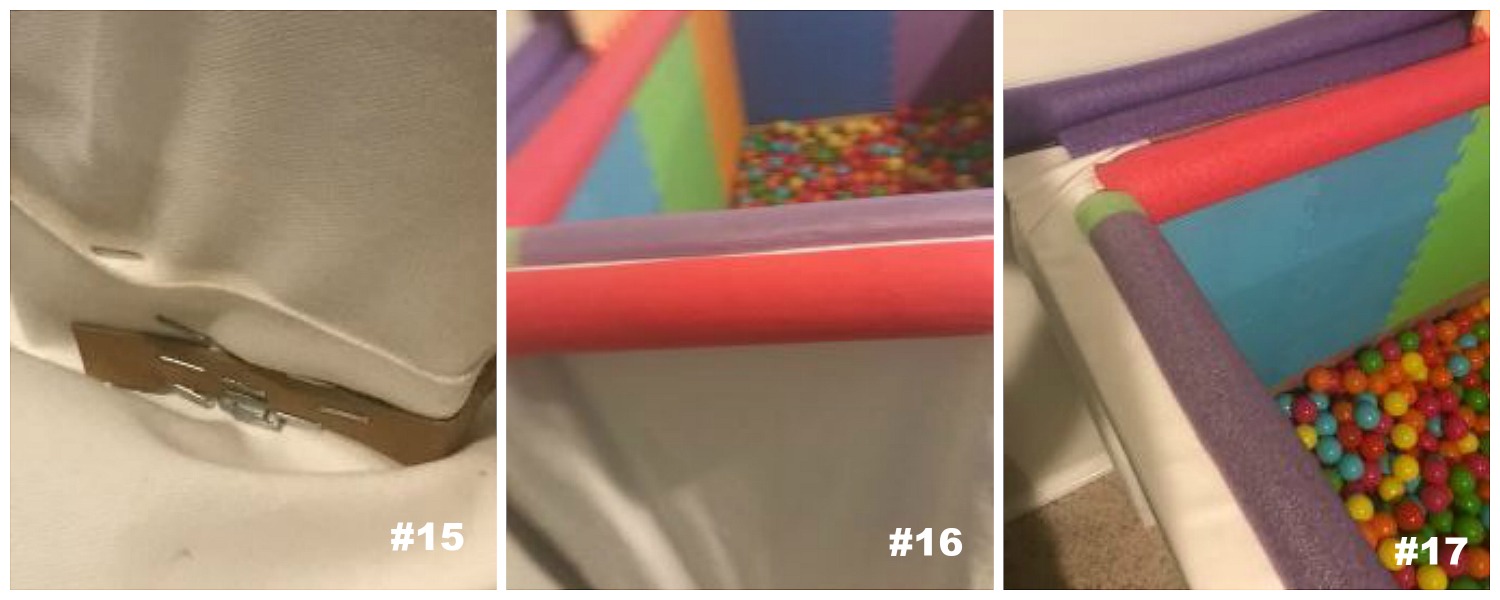 Picture #15: An example of the wad of staples we wanted to hide; Picture #16: The finished edge; Picture #17: Feel free to piece together pool noodles when you have a spot that runs longer than expected.
Attaching the Basketball Hoop
I don’t know about you, but when sitting in a pile of plastic balls, my family tends to start throwing them at each other. So in an effort to give them something to do, I added a basketball hoop. The original Pinterest tutorial suggested it too, so I wasn’t all that inventive. But I am glad it added it! I used some scrap lumber to build a cross to hang the basketball hoop on, and then supported it with cross members. I screwed everything together with 3-inch self-tapping wood screws. That self-tapping business saves so much time!
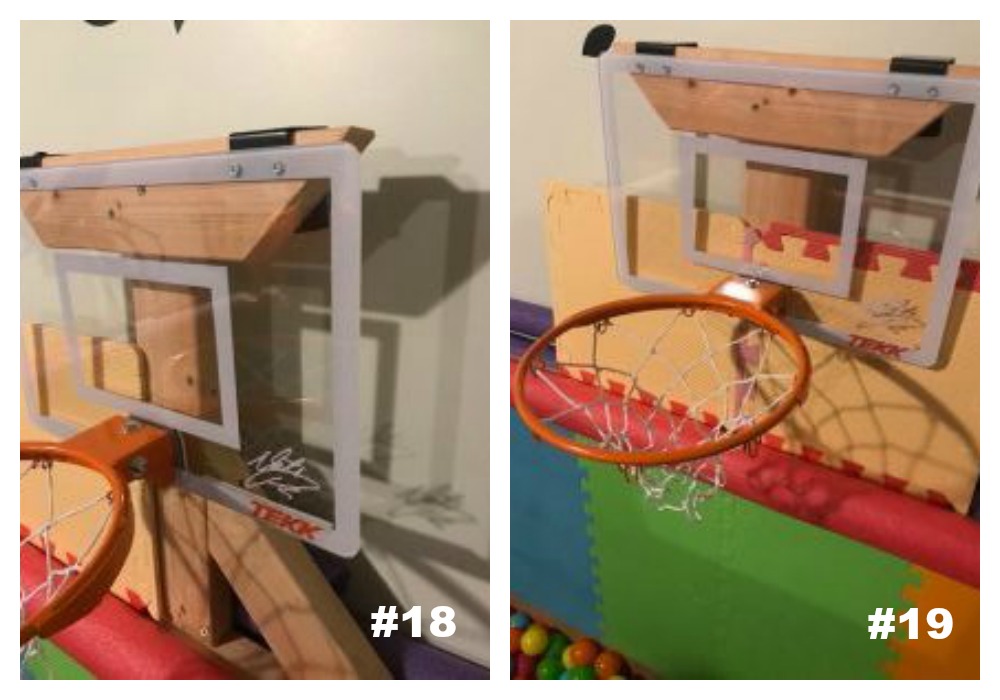
Picture #18: Basketball hoop support; Picture #19: Foam hiding supports.
I then took leftover foam padding and made a barricade behind the hoop. I was trying to keep balls from falling behind the box. Then, I shoved some pool noodles back in there to really make sure none of them were going anywhere.
Covering the Outside Step
Before I was done, I had to cover the remaining outside step. I did my best to wrap the fabric around the very edges. Then I took strips of fabric and tied down some foam like I glued up inside. I wanted to make it secure without creating any sharp edges. So, again, nails and staples just weren’t an option. This is how it turned out. I could have hidden the ties, but I wanted to be able to switch out the fabric down the road when it got dirty. Even though we have a “no shoes on in the house” rule, I knew it was just a matter of time. I like how it turned out. It is soft without being slippery.
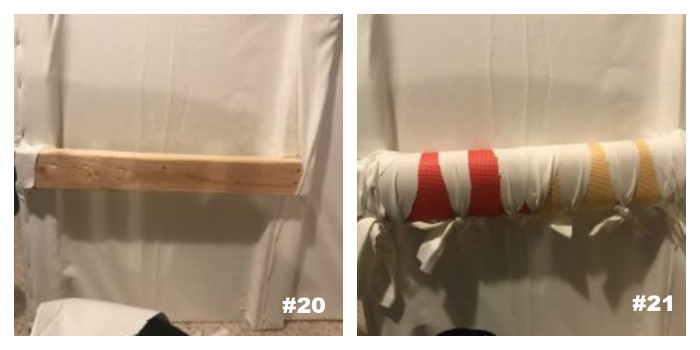 Picture #20: Fabric on, but no foam. I covered the edges because I knew the foam would not reach that far; Picture #21: Finished step.
Balls!
Finally, we were ready for the balls. This was my favorite part! There are a lot of sizes online. I thought I ended up getting a pretty standard size — they were definitely affordable. But they were smaller than some. I chose to keep this size, though, because the bigger balls were nearly three times the price and so not worth it. But I thought I would show you the two side by side for comparison. Keep in mind, I had to order about 5,300 balls — so the affordability factor became a heavy decision maker for me.

The small red one was ours, and the larger green ones were the much more expensive option.
I added a few more things, like the same kind of blow up shark that the original inspiration post had. And I love it! But most of all, I love having the whole family together without a single screen on. Because who can sit and watch their phone while sitting in a ball pit? My son has brought the dog into the pit once, but the poor thing thought she was drowning. And at only 8 pounds, she pretty much was!
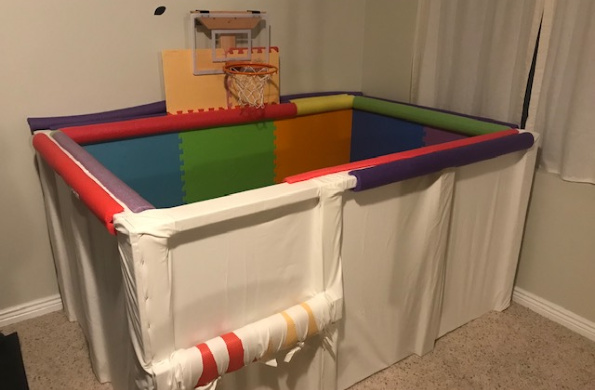
So our family now has a ball pit! I am so deliriously proud of myself for successfully building my own. The cost came out to a fraction of what one like our therapist has. And I was able to make it big enough for the whole family! Well, two adults and a tween, but that is our whole family.
To read more of Abby’s articles, click here.
I am trying really hard not to tell EVERYONE I know about it, because it really is my son’s decompression space — and it has been worth every penny for the peace he feels inside it. For me, being in the ball pit can be exhausting. Having balls pressing all over your body when you aren’t used to it is a little overwhelming. But for my son, it helps regulate his senses and gives them a break.
I hope you get a chance to build your own ball pit if you want to. Check out this Pinterest post if you want to build your own. It will give you an idea how many balls you need. And there is even a calculator in there if you decide you want to fill your entire apartment with balls. Heck, it would save you from ever having to vacuum again!
Abby is capable and caring. She is learning more about Autism and parenthood every day. Having completed training to be an RBT (Registered Behavior Technician) for ABA therapy she is beginning to understand her son. And even though she is the first to admit she makes a lot of mistakes, she is so grateful to be on this journey. She comes from a family with many autistic members. She invites us to join her, as she shares her adventures. She wishes to emphasize that Autism is a difference not a defect. If you or a family member have autism, Abby wants you to know that the challenges can be overcome, and there are blessings in autism. You or your loved one are not sick or broken. Together we will teach the world this new language.